How to enable Instafloss for MailUp
Instafloss gives MailUp real-time capabilities! Follow the instructions to start preventing bounces before they happen:
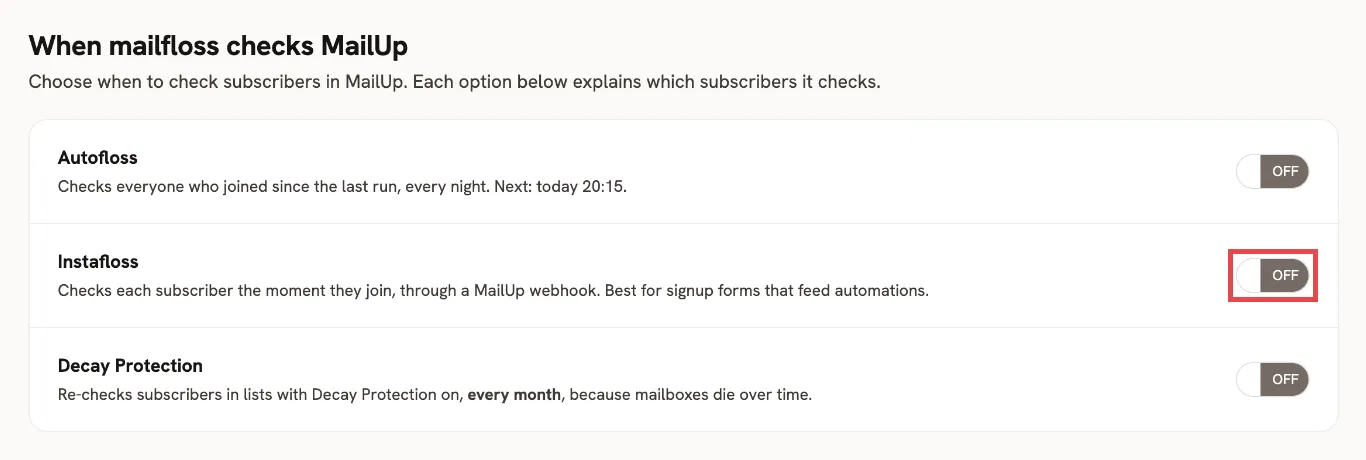
Step 1. In your MailUp integration, open the Schedule tab and switch Instafloss on.
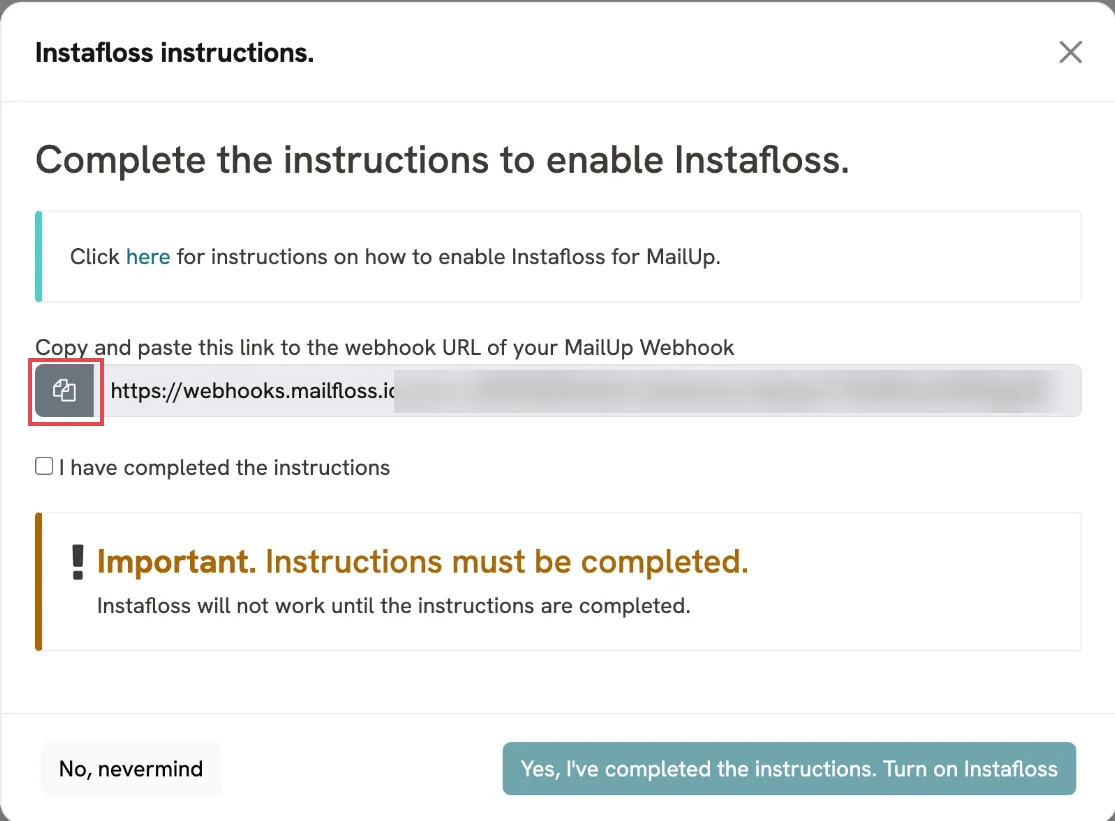
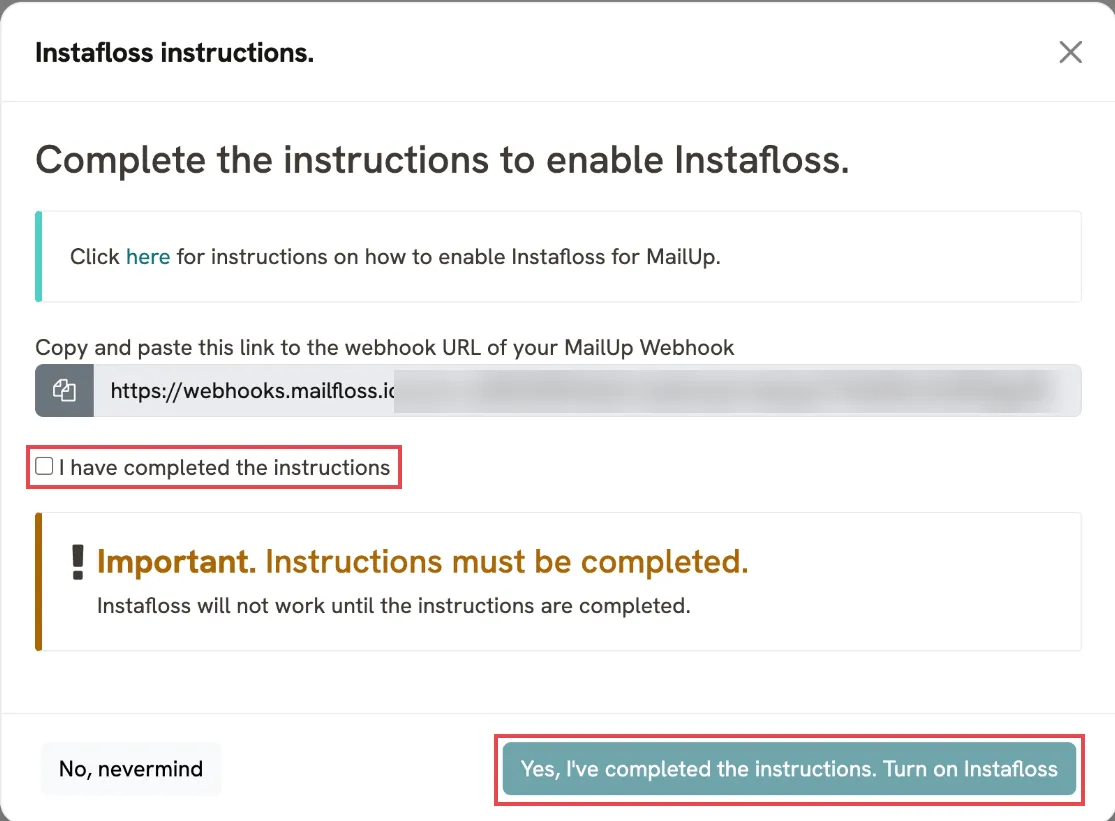
Step 2. Copy the webhook URL from the Instafloss instructions dialog.
When you switch Instafloss on in the Schedule tab, the Instafloss instructions dialog opens. Click the copy icon next to the webhook URL.
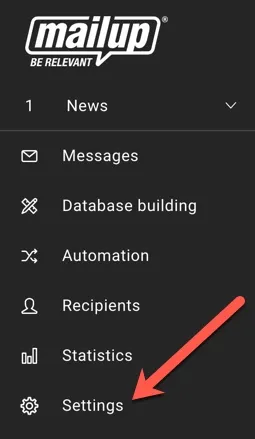
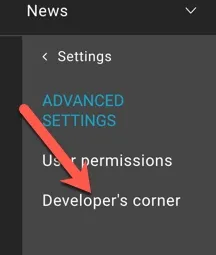
Step 3. In MailUp, click Settings in the left sidebar
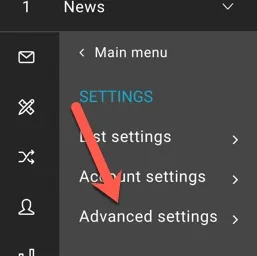
Step 4. Click Advanced settings
Step 5. Click Developer's corner
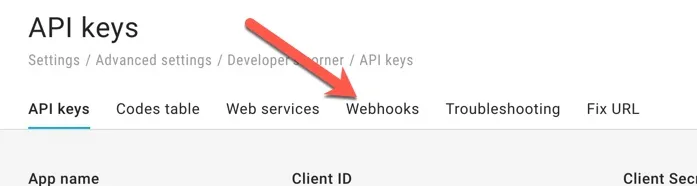
Step 6. Click Webhooks
Step 7. Click NEW WEBHOOK

Step 8. Paste the webhook URL copied from step 2 into the Callback URL
Ensure the Active switch is green, select the List your want Instafloss enabled for, give it a Name, choose Subscribe from the Event dropdown, choose POST from the Method dropdown, choose your Source (most likely Recipient) and then click Save
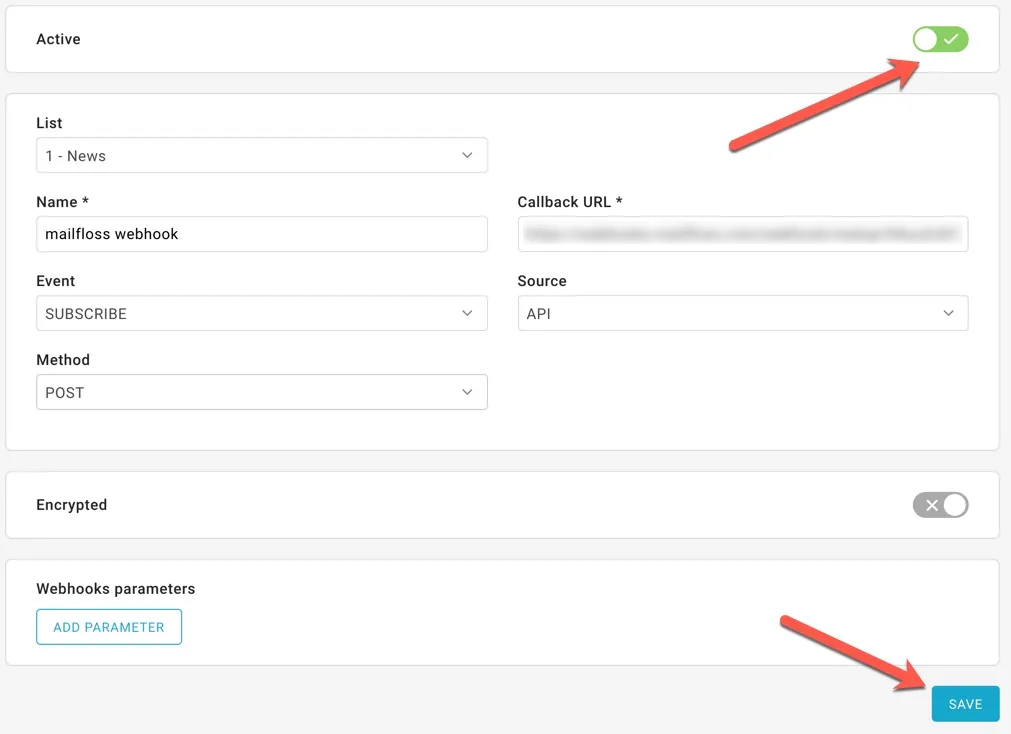
Step 9. (optional). Repeat steps 8 and 9 for each List and each Source you want Instafloss enabled for.
Step 10. Back in mailfloss, confirm and turn on Instafloss.
In the Instafloss instructions dialog, tick I have completed the instructions, then click Yes, I've completed the instructions. Turn on Instafloss.
Please note that Instafloss is for real-time operations only. For bulk import/cleaning operations, see this article. Please do not send large batches of email addresses to the provided webhook address.